

Visa India, practical guide for online compilation
With this guide we will explain all the necessary steps to correctly apply for an India visa online.
INDIA: MAGIC AND COLOUR
Visiting India means diving into a reality full of traditions and contradictions. A reality that has the power, however, to give the visitor an engaging and transformative experience. Sounds, colours, spirituality but also resignation, poverty and dignity will be your travelling companions if you decide to go to India and immerse yourself in its everyday reality.
The fundamental thing is that you are not in a hurry. Only by really descending into the world you are exploring you will be able to absorb its deep energy. But let’s see now how to get a visa to India, the first thing to take care of when you decide to plan a trip to this country.
INDIA VISA: THE VARIOUS TYPES
As there are many options available to the traveller, we list below the various types of visas for India that you can apply for:
- Tourist Visa (TV): it’s the visa intended for those who go to India on holiday, to visit friends or to attend meditation and yoga classes, for example.
- Business Visa (BV): it’s required for all those who travel to India for business purposes, to attend trade fairs and trade conventions or for pilots in civil aviation.
- Employment Visa (EV): This visa is required for those who have a regular employment contract in India.
- Student Visa (STV): this visa is required for those who study and must travel to India to participate in training or collaboration in universities.
- Conference Visa (CV): this visa is necessary for those who have to attend as a speaker (and not only) at conferences organized by institutions, bodies or the various universities in India.
- Journalist Visa (JV): specific visa for the activities of journalists and photographers who want to carry out their work in India; also extended to directors and all those professional figures working with the mass media.
- Medical Visa (MV): indicated for those who need to go to Indian health facilities for treatment.
- Entry Visa (XV): indicated for visitors of Indian origin, close relatives of Indian citizens (husband, wife, children).
- Research Visa (RV): visa required for all those who are engaged in research projects at Indian institutes or universities.
- Project Visa (PV): visa required for those who work in the energy and steel project sector and must travel to India for this purpose.
- Transit Visa: this visa is intended for those who only need to travel through India and has a very limited duration.
- India Online Visa (Entry Authorization): this visa, called “e- ancoVisa” or “Electronic Visa”, can be applied for through the official website of the Indian Governorate “India Visa Online” and is subject to certain restrictions. The visa application made online, in fact, allows you to apply for and obtain the tourist visa (eTV), the business visa (eBV), the medical visa (eMV) and the conference visa (eCV). As a rule, therefore, will be the traveler who needs the visa for vacation or business to choose for this solution, faster even if based on a rather complex procedure, as we will see later.

GATES FROM WHICH IT IS PERMITTED TO ENTER INDIA
India can be reached through the following gates:
Ahmedabad, Amritsar, Bagdogra, Bengalore, Calicut, Chennai, Chandigarh, Coching, Coimbatore, Delhi, Gaya, Goa, Guwahati, Hyderabad, Jaipur, Kolkata, Lucknow, Mangalore, Mumbai, Nagpur, Pune, Tiruchirapali, Trivandrum, Varanasi.
TRADITIONAL TOURIST VISA AND ELECTRONIC VISA FOR INDIA
The traditional Tourist Visa for India is what you can apply for at the Indian consulate or embassy of your country, but be sure to first carefully consult the information that both institutions provide on the relevant pages, in particular the notice that warns of a series of “fictitious” sites that operate fraudulently with the promise to assist travelers in applying for a visa to India.
CHARACTERISTICS OF THE ELECTRONIC VISA (E-VISA) FOR INDIA
Please note that the e-Visa is valid for 30 days from the date of entry into India. It is required from 30 days up to a minimum of 4 days prior to arrival in India, and it is important to stress that this type of visa cannot be renewed. When it expires, in fact, it is necessary to request another one ex-novo. Moreover, in one year it is possible to apply for only 2 e-Visas.
VISA FOR INDIA: THE NECESSARY DOCUMENTS
Let’s see what documents are required to apply for a visa online for India:
- Passaport: Your passport must be valid for at least six months with reference to the date you apply and must still have at least two consecutive blank pages (if your passport has just been renewed, you will also need to present a copy of your old passport).
- 2 Passport size photos, in colour, on a white background, cm.5 x cm.5 in size, to be provided as a file with a maximum size of 1Mb.
- Copy of your flight ticket reservation..
- Copy of the hotel reservation and details of the trip with the description of all the scheduled stops. If you are staying with a private individual, you must provide a copy of the invitation letter written in English and the identity document/visa of the host..
- Online, printed and signed visa application form
If you wish to travel to India for a standard holiday, simply use the online e-Visa application form. The e-Visa, is not a real visa but a sort of “entry authorization” in India, as we were saying, since the real visa will be in this case applied on the passport by the competent authorities upon your arrival, once the necessary checks are made and the biometric data that identify you are noted.

INDIA VISA ONLINE E-VISA: COMPILATION GUIDE
To apply for an electronic visa, first log on to this address: https://indianvisaonline.gov.in/evisa/tvoa.html and click on “APPLY HERE FOR E-VISA” below.
Once you click on the link, a window will open containing the form to fill in. There are a lot of questions you will have to answer, so we suggest you to do this operation having all the necessary documents at your fingertips and having enough time, as well as a good dose of patience. Some of the questions may seem out of place but, unfortunately, it is not possible to avoid them.
INDIA VISA ONLINE: FIRST PAGE COMPILATION
In the first screen that will open after clicking on the link we have indicated, you will be prompted:
- type of passport (you will have to tick, from the ‘drop-down menu’, the item ‘ordinary passport’).
- nationality
- arrival airport (always from the drop-down menu, select the arrival airport)
- date of birth
- E-mail (to be inserted twice)
- date of arrival: (please indicate the date of your arrival in the form DD/MM/YEAR).
- type of visa (tick the box of the type of visa you need, choosing from the following:
- eTourist Visa (available for 30 days, 1 year or 5 years)
- eMedical Visa
- eBusiness Visa
- eConference Visa
- EMedical Attendant Visa
You will notice that at this point, on the same screen, at the box relating to the type of visa you have chosen, other choices will be displayed. For example, if you have chosen eTourist Visa for 30 days, the system will ask you to enter an arrival date within 30 days of applying for the visa.
Below the ticked box to apply for eTourist Visa, you will see a list of activities to best define the type of your trip to India, and you can choose only by ticking the box next to the description. Then select the reason for your trip and continue by entering the encrypted confirmation text at the end of the page, ticking the information box (bottom left) that warns you to keep the necessary documents handy to continue filling in.
Once you have completed this first screen, click on the Continue button. You will notice that, once clicked, a notice will appear with the specification that this documents are required:
- the (recent) colour photos already indicated
- copy of your passport where your information is present
In the meantime, you will already have everything available, so confirm and go to the second screen.
TIP: In order to assist you in compiling your application, the Government of India has prepared a pdf guide which can be downloaded at: https://indianvisaonline.gov.in/evisa/tvoa.html.
We recommend that you download it by clicking on the button on the lower left hand side, identified by the words “SAMPLE E-VISA APPLICATION”
WARNING: If for some reason the compilation of this first page does not continue quickly or if you take too much time, the system will suspend the operation and you will be warned to close the procedure. In this case, an email is sent at the same time to the address you have entered, where you will find the link to resume the compilation and your security identification code, which you must enter in order to continue with the entry of other data/documents. In this case you will have one week to complete the procedure.
INDIA VISA ONLINE: FILLING IN THE SECOND PAGE, PART 1
If, on the other hand, the compilation has continued regularly, after clicking on the “continue” button, you will find yourself on the second registration page. At the top, you will notice the temporary code assigned to you (the identifier we mentioned earlier). It is advisable to make a note of it so that you can use it if necessary in case the compilation stops as described above. On this second page you will have to enter:
- Surname (as it is written on your passport)
- Name (as it is written on your passport)
- Gender (man/woman/other*)
(*there is also a box for ‘transgender’ and a box to be ticked if you have changed name) - date of birth
- city of birth
- country of birth
- your identity card number
- your religious faith
- any special signs (also included in the identity card).
- indication of the degree of studies
- nationality
- indicate how citizenship was obtained
- certification that you have been residing for at least 2 years in the country from which you apply for the visa.
- passport data.
Now that you have completed the first part of the second page, you have two options:
- Save the entered data and continue the compilation by clicking on the “SAVE AND CONTINUE” button at the bottom left of the page.
- Save the compilation and write the temporary code to continue entering the other data later by clicking on the “SAVE AND TEMPORARLY EXIT” button at the bottom left of the page.
IMPORTANT: you must in any case complete all the fields (mandatory), so you can continue with the next screen.
INDIA VISA ONLINE: COMPILATION SECOND PAGE, PART 2
In this part of the compilation you will have to enter:
- your address
- the province
- the C.A.P.
- your landline phone number (optional)
- your mobile phone number (optional)
- your e-mail address (twice)
Then continue in the next section of the same page, entering:
- the information about your father
- the information about your mother.
A seguire poi, inserirete:
- il vostro stato civile
- l’indicazione se avete eventuali genitori/nonni Pakistani
Next, you will enter:
- your marital status
- an indication whether you have any Pakistani parents/grandparents
- Finally, at the bottom of the page you must indicate:
- your current occupation
- the name of your employer
- the address of the company/place of work
- your previous occupation
- an indication of whether you’re with the police, the army or security.
Also in this second part, you can click on the “SAVE AND CONTINUE” button to continue with the third compilation page, or click on “SAVE AND TEMPORARLY EXIT” noting the Application ID (your identifier), to continue the compilation later.
Be patient, the procedure is almost complete.
INDIA VISA ONLINE: FILLING IN THE SECOND PAGE, PART 3
On the third page you will have to enter:
- the Indian cities you intend to visit (no need for too many details)
- from which city you will leave India
- if you have visited India before (in this case you should indicate in which cities you have been)
- the number of the previous visa (if you have already been to India)
- specify whether your visa was refused on that occasion
- indicate all the countries you have visited in the last 10 years
- specify if you have visited one of the countries of the SARC group (Sri Lanka, Afghanistan, Bangladesh, Bhutan, India, Maldives, Nepal, Pakistan) in the last 3 years.
- indicate the data of a contact person of yours in India (you can also enter the Hotel and the reference data of the structure)
- indicate the data of one of your contact persons in your Country
At this point complete everything with the usual procedure:
- click on “SAVE AND CONTINUE” to continue with the compilation.
- Click on “SAVE AND TEMPORARLY EXIT” to continue with the compilation afterwards, taking note of the Application ID number).
IMPORTANT: all information must be true, especially regarding previous entries into the country. If, from the checks, the authorities find that you have not reported other entries into the country, the visa will be refused.
INDIA VISA ONLINE: FILLING IN THE SECOND PAGE, PART 4
Now that you have completed all the data fields, you will need to upload your photo and passport page.
You can then select the photo file, making sure that the image is centered, contains no shadows, is on a white background and has a clearly visible face. The dimensions of the photo, as already mentioned, must be 5 x 5 cm and the file must not weigh more than 1Mb.
The same procedure should also be performed with the page of the passport that contains your data, i.e. the page of the document that contains your photo. Also this file must be well readable and without shadows covering the data or the photo.
INDIA VISA ONLINE: FILLING IN THE SECOND PAGE, PART 5
We have reached the final stage of the compilation, which also includes payment.
The cost of the online visa for India is about 80 dollars, to which you will have to add the procedure fee of 2.5%.
We remind you that this amount will not be refunded in case the application is refused and the visa denied.
For the payment you have two alternatives to use:
- SBIePay (valid for all MasterCard and Visa cards).
- AXIS BANK (valid for MasterCard, Maestro and Visa).
The second option is the most commonly used.
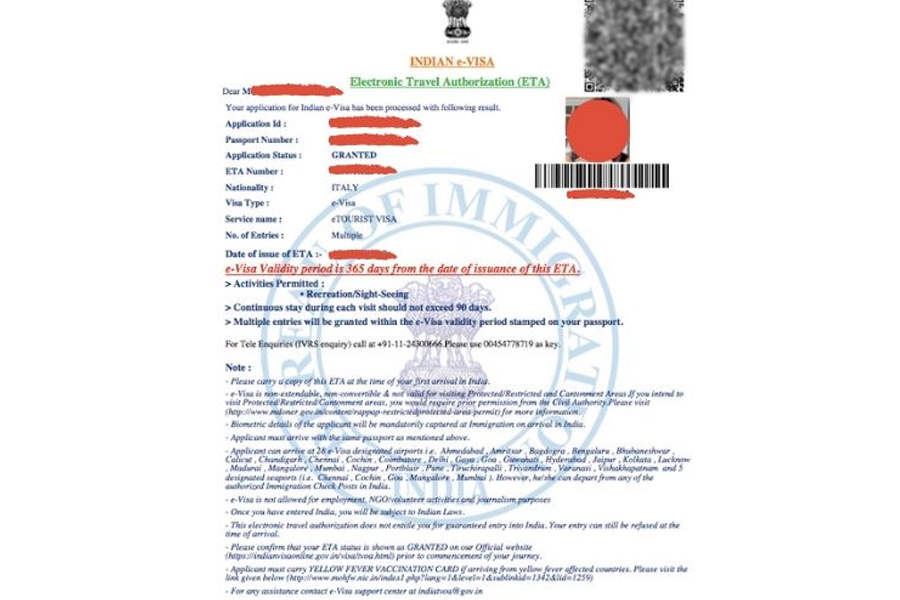
E-VISA: VISA APPROVAL
When you have completed the payment, you will receive an email to the email address you provided during the compilation, with a subject similar to the following:
“Status Regarding e-Visa Application Id: (il vostro numero di ID Application)”
Attention! This email will only specify the receipt and registration of your request, not its acceptance.
The email that certifies, therefore, the issuance of the visa and the confirmation for your entry into the country, will always reach you by email within the next 72 hours.
When you receive this second email, you will have to print it and attach it to your passport, together with the boarding pass that they will give you on the airplane. These are the documents that you must present to the authorities when you enter India.
If you do not receive the confirmation email within 72 hours, return to the website:
https://indianvisaonline.gov.in/evisa/tvoa.html
and consult the “CHECK YOUR E-VISA STATUS”
Once you have opened the site page and clicked on the section indicated, enter the required data, including your Id Application to check the status of your request.
From what you have read in this article, the procedure for applying for an electronic visa for India is quite complex and requires many steps, but thanks to the PDF guide provided by the Indian government website (which is however written in English as the whole site) and the suggestions we have provided, you will be able, with a little care, to fill in the various online forms correctly without too many difficulties.
However, if you need more peace of mind and comfort, the suggestion is obviously to rely on some specialized agency that will be able to guide you in the best way.
After obtaining your visa for India, you just have to choose one of our itineraries.
We wish you a good trip to India!